iOS 14 Features — Revision Part-1
Hey buddies, we are almost near to iOS 15. But Many of us not yet completely know the iOS 14 features still like me😅. So here is some piece of concepts from iOS 14 for our revision. Here i shared most of the new concepts from iOS 14. This is just a part 1. So we can do further with further parts. Now will explore iOS 14.


Here, I made a complete app with tab bars to comprise part 1 iOS 14 features in single app.
Part 1 Includes in iOS 14:
- Multi-line editable text field.
- Color with Color picker.
- Disclosure button.
- Tabview with tabitem.
Special Parts:
- Expandable Lists.
- Collection view using List.
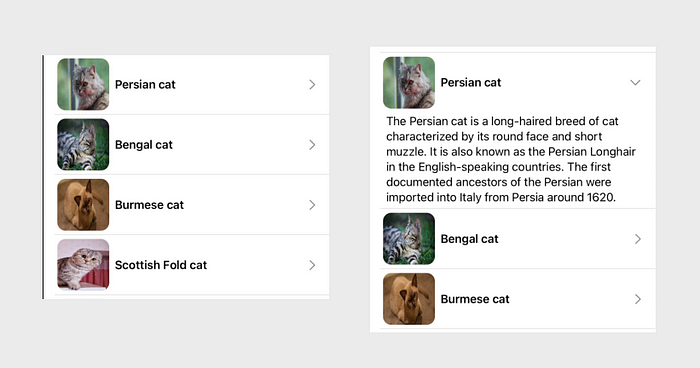
Expandable Lists
Here i use local data model class. I will post a sample data model. you can use anything for the replacement.
class TableData: Identifiable{ var name: String? var image: String? var detail: String?}
I started here with expandable lists and it will be very easy to implement expandable list in SwiftUI compared with Swift storyboard. We can use either disclosure button or normal button to create expandable rows for list. Here i use both options to implement this. Create a separate file or add the below code in same file. If you want preview add in separate file.
Here is how i created the cell without disclosure button.
struct ListRow: View { @State var rowData = TableData() @State var revealDetails = false @State var imageNAme = "chevron.right" var body: some View { VStack{ HStack(alignment: .center, spacing: 0.0){ Image(rowData.image ?? "") .resizable() .frame(width: 75, height: 75) .cornerRadius(12) Spacer() Button(rowData.name ?? ""){ revealDetails.toggle() imageNAme = imageNAme == "chevron.down" ? "chevron.right": "chevron.down" } .font(.headline) Spacer() Image(systemName: imageNAme) .foregroundColor(Color.gray) .frame(maxWidth: .infinity, maxHeight: .some(35), alignment: .trailing) .frame(maxWidth: .infinity) } if revealDetails{ Text(rowData.detail ?? "") .font(.body) .lineLimit(nil) } } }}
If you want to use disclosure button replace the button code with below code.
DisclosureGroup(rowData.name ?? "", isExpanded: $revealDetails) { Text(rowData.detail ?? "") .font(.caption) } .animation(.easeInOut) .font(.headline)
Now in contentView create list and add the cell.
List(tableData){ data in ListRow(rowData: data, revealDetails: false)}
Now add the tab bar for this list now. Use Tabview and tabItem to add tabbar.
TabView{ List(tableData){ data in ListRow(rowData: data, revealDetails: false) } .tabItem { Image(systemName: "house.fill") Text("List") }}
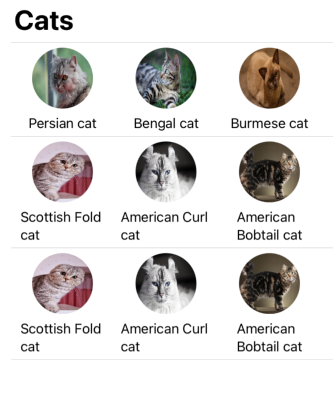
Collection view using List
Ever wonder why SwiftUI has no collection view instance. Am also don’t know why!😅. But some may use viewRepresentable as their trick. But i try to implement collection view using List. So here i arrange 3 cells in a row and like wise other row with more than a column.
struct CollectionCell: View{ @State var items: [TableData] @State var iteration = 0 var body : some View { HStack(){ ForEach(iteration..<(iteration+3 <= items.count-1 ? iteration+3 : items.count)) { item in VStack{ Image(items[item].image ?? "") .resizable() .frame(width: 75, height: 75, alignment: .center) .cornerRadius(37.5) Text(items[item].name ?? "") } } .frame(maxWidth: .infinity) } }}
Now get this view in to list. Give n data to single cell as per the desire. Here i give 3 column data.
struct CollectionViewUI: View { let items: [TableData] = initData.shared.DataREturn() @State var iteration = 0 var body : some View { List{ ForEach(0..<(items.count%3 == 0 ? (items.count/3) : ((items.count/3) + 1))){(row) in CollectionCell(items: items, iteration: self.iteration >= row ? 0:self.iteration+3) } } }}
Now run the code.
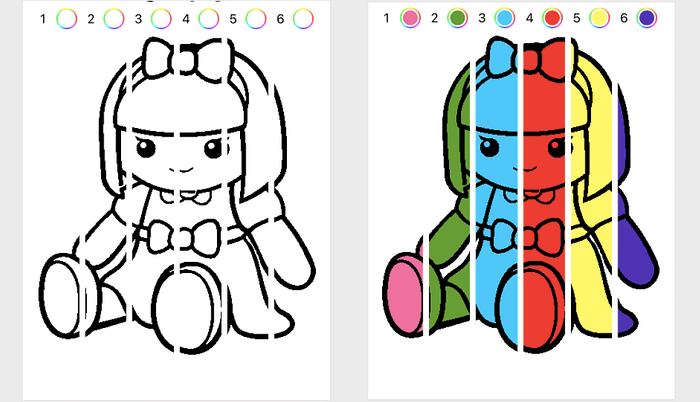
Color with Color picker
The new feature which very impressed me is color picker. Here i slice a png and show in a hstack and enable user to color the png.
HStack{ VStack(){ ColorPicker("1", selection: $p1Color) .frame(width: 50, height: 30, alignment: .center) Image(imgArray[0]) .colorMultiply(p1Color) } VStack(){ ColorPicker("2", selection: $p2Color) .frame(width: 50, height: 30, alignment: .center) Image(imgArray[1]) .colorMultiply(p2Color) } VStack{ ColorPicker("3", selection: $p3Color) .frame(width: 50, height: 30, alignment: .center) Image(imgArray[2]) .colorMultiply(p3Color) } VStack{ ColorPicker("4", selection: $p4Color) .frame(width: 50, height: 30, alignment: .center) Image(imgArray[3]) .colorMultiply(p4Color) } VStack{ ColorPicker("5", selection: $p5Color) .frame(width: 50, height: 30, alignment: .center) Image(imgArray[4]) .colorMultiply(p5Color) } VStack{ ColorPicker("6", selection: $p6Color) .frame(width: 50, height: 30, alignment: .center) Image(imgArray[5]) .colorMultiply(p6Color) } }
Here is the results.
Now go for multiple line TextEditor.
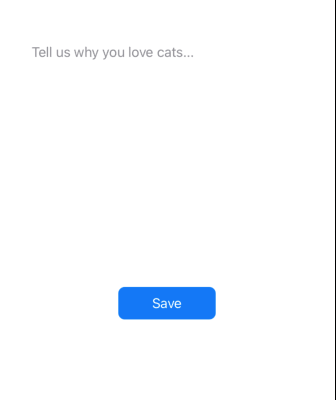
Multi-line editable text field
Its a easy concept in swift ui. Here is a multiline editable textfield
TextEditor(text: $placeHolder).frame(width: UIScreen.main.bounds.width - 70, height: 300, alignment: .center).foregroundColor(colorFont).onTapGesture {colorFont = Color.blackplaceHolder = UserDefaults.standard.value(forKey: "text") == nil ? "": UserDefaults.standard.value(forKey: "text") as! String}Button("Save"){UserDefaults.standard.setValue(placeHolder, forKey: "text")}.frame(width: 120.0, height: 40.0).background(Color.blue).foregroundColor(.white).cornerRadius(8)}
Follow me for more iOS 14 updates.